Tag Archives: stop motion

Exploring Animation

Today I have started a new course of animation. it’s an online course from Future Learn titled ‘Explore Animation’ it’s designed to take 4 weeks to complete dedicating 3 hours per week. It’s content should apply to all animators across all mediums and includes exercises and award winning shorts to study. It’s being presented by the NFTS (National Film and Television School) and is free to participate, optionally you can purchase a certificate after completing the course to add to a CV or resumé, or use it as evidence of Continuing Professional Development (CPD)

You can sign up here
https://www.futurelearn.com/courses/explore-animation/
I’ll be posting my task videos and thoughts on this blog, coming up first will be a simple flipbook animation done on post it notes

More Silicone Puppet making

Since my last post I have managed to track down and purchase more materials such as Chavant clay and Toluene (A paint thinner that also works on silicone) And I used the process to make 3 more models and moulds the 3 part mould (my first ever) for an aardvark, an ape and a toad.

Arvin in chavant

Arnie Aardvark in chavant

Arnie and Slinky

Arnie and Slinky

arnie divided ready to be cast in plaster

arnies first section curing

arnies 1st part of the mould cured

arnies mould part 2

arnies mould ready for part 3


arnies mould complete, left, right and underside

arnies 3 part mould assembled

arnies armature

Arnie’s armature has metal nuts in his feet, they’re magnetic, so I can use magnets to secure the model when animating OR use ‘traditional’ tie down screws too (I’ll probably use magnets)

arnies armature


For the toad and ape I made armatures first so I can be sure they fit inside my models, they also have nuts in their feet for magnetic tie down

terry toads armature

terrys armature

terrys model

terrys model

arvins model in chavant clay (armature inside)

the crew so far

arvin ready to be cast

arvin detail plaster coat, painted/daubed onto the model directly so as to preserve fine details

painting the first detail coat of crystacal R plaster onto arvin model to preserve fine details

detail plaster coat finished

Arvins top half completed, hessian is added in layers of the plaster mould to add strength to the mould

Perfect £1 bucket for plaster, it’s flexible so dried plaster can be cracked off and disposed of, DO NOT wash wet plaster down sinks and drains.

arvin’s mould removed, lots of left over WED clay that needs to be cleaned off

arvins top half ready for casting

Easily the best way of cleaning off moulds, I saw them doing this on Face Off with a hose, I don’t have a hose, but I do have a shower!

these clay blocks in the middle will form drainage pools so excess silicone can pool into these resulting in thinner edges on the model and a tighter mould.

Terry Toads mould and armature

Arvins Mould


Yesterday I cast the aardvark in silicone.

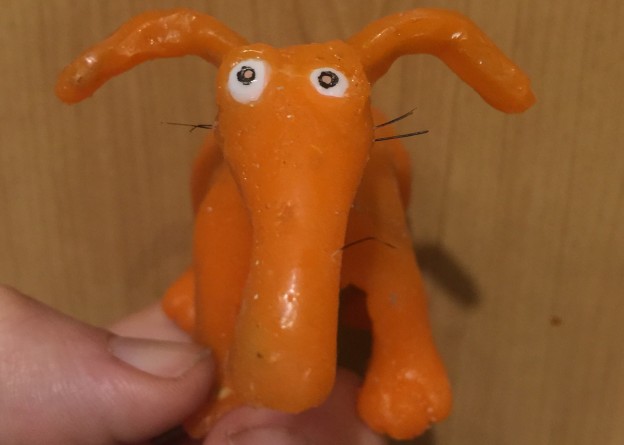
Arnie’s silicone model, a few issues, mainly the bi air bubble on its back

excess silicone edges/flash/sprue trimmed and bubbles cut out, I decided to patch the holes with more silicone

Bubble holes filled in the mode is shiny because the silicone is still wet

The bubbles were a shame so I had to mix up another batch of silicone and touch up and fill the areas.

Ears added on, they also have wire inside, a hole was drilled into the milliput skull and ear wire inserted into the hole, extra silicone added to add skin and secure the ear in place

bristle hairs added


The ears were carved from some left over silicone, I shoved a wire into them and drilled a hole either side of his head into the milliput skull, and inserted them afterwards adding an extra layer of silicone on top and around the base to stick the ear in place, the hairs are simply a hole pierced into the silicone and old thick paint brush bristles inserted, painted black..

Now to make the toad and ape. Will have to make the feet again for the ape as his model ‘locked’ in the mould and I had to carve it out so now his feet area have holes through to the top. This probably occurred due to poor decision of where to build my dividing wall for his feet as such his toes were wider than the space behind it and once the plaster had set I had sealed his foot in a chamber it couldn’t pull out of.

Rookie adventures in silicone puppet making

For my current ongoing project Jungle Tails I’ve stepped outside my comfort zone on a few aspects to broaden my skill set, one of which is puppet making.

Taking my previous experiences into account working on Tyler Tigers first birthday

[youtube=https://www.youtube.com/watch?v=gUzoKGdqFrU&rel=0]

I knew clay models would melt on set under my studio lights, this means I would need to seek out alternative materials or clay compounds if I wanted my models not to warp and melt so much in the heat. This leaves Foam Latex and Silicone as the main go to materials for making puppets, I’ve never had the chance to work on silicone puppets before so decided to jump in as it was cheaper to start with than foam latex (from what I understand the foam latex would see me through further but has a higher upfront cost than the silicone). Foam Latex is very smelly to work with too, smelling something like gone off omlette, and so requires more care and dedicated equipment so I opted for the less smelly silicone.

I’ve also been watching a lot of ‘reality competition show’ Face Off where special effects make up artists compete to create special effects makeup pieces for films (and sometimes other theatrical displays) to a brief over 3 days. A lot of the processes and materials are the same for stop motion models, so I researched the materials they’re using which led me to try and find the UK equivalent brands too many online tutorials are based in America so it can be an issue figuring out what the products are and their availability in the UK.

2 of the main products used are ultracal casting plaster (UK equivalent is Crystacal R) and WED Clay no one I spoke to knew of WED clay but I did find some for online sale.

Staffordshire University were able to supply a big bag of Crystacal R for the best price (essentially no shipping fees which on 25kg bag of specialist plaster is huge) They also kindly lent me the trolley to get the bag home!

The WED clay is used on face off to model their prosthetic appliances where they get very good detail, the models I’ve made this time are quite simple and small and I made the first model for slinky the snake in this material.

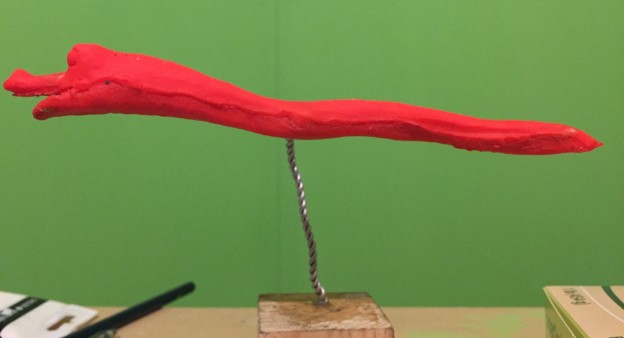
Slinky Snake modeled in WED clay with a dividing wall , I didn’t use this exact model in the end but it’s as good a representation.


looking at some recent tutorials for silicone casting I saw the use of Lego as reusable support walls to keep plaster in and moulds tidy

Here is the first half mould Imade in crystacal, casting the top half of Slinky into ‘stone’


The top half was cast then the mould flipped, supporting clay removed and the other half was then cast


Slinkys mould came out well, the black marks are where i decided to use plasticene modelling clay to support the wed clay figure, I now know it’s better for stop motion to work the other way around and use the WED clay to support a non air drying moulding clay like super sculpey or what i now own chavant.

As previously mentioned I have never worked with silicone and was expecting to have some issues like I had with liquid latex, I pre tinted my silicone with a little oil paint, mixed to instructions, painted it into details on the mould, poured in more silicone to both halves, laid in the armature I had made, sandwiched the two halves together and prayed.

Surprisingly I was very pleased with how my first model came out, it had cured well, details remained and armature inside worked well enough.

[youtube=https://www.youtube.com/watch?v=xxQazKXR-Wg&rel=0]

However I had issues with attaching the eyes so decided to recast the model with a solid headpiece with the eyes embedded in sockets already so I could easily move them with pins later on.

Beginners luck had struck.

Slinky didnt cure this time and came out goopy and gory looking! KILL IT NOW

This second model did not cure at all!

Some research later I discovered I could clean the mould out with white spirit, it worked really well!

At this point I took the opportunity to sand down the edges of the mould as it had sharp edges and was easy to cut or scratch myself and my surroundings, and possibly lead to ripping of the model.

Time for cast #3 I added more catalyst this time and that seemed to have worked well and the silicone cured very quickly, the eyes move in this new model but still required some touch up where silicone was thin/torn and edges tidied up where I’d cut them.

Learning from the first cast I also filled in the support mounting hole in the armature with clay as the first time I had neglected to do so and it had filled with silicone and required tricky digging and cutting out in order to locate the support mount into his side.

Some detail work later and this is most likely the model that will appear on screen. I need to work ALOT on painting with silicone, as currently I’m struggling getting the correct mixture consistency before it cures and becomes gloopy, I’ll need to look into special effects makeup tips I think.

Silicone is definitely something I will continue to use for future models and with practise I can only improve my skills with the material.

Since draft writing this article I have discovered a recent tutorial on silicone puppet casting where the sculptor is very detailed and descriptive of his process on a simple model and mould. He uses chavant modelling clay to sculpt the model first, you can heat it with a small blowtorch to soften it and smooth out details and add fine touches then surround and support the model with the softer WED clay for casting, you can then recycle this WED clay after the mould making has been completed.

I’ve also got some more tips on working with and painting silicone.

My next model will be an aardvark also for jungle tails, and I may need to create a 3 part mould, again something new and scary to me, I will be trying out some of the tips mentioned in this other tutorial I saw and feel a little more confident in the whole process and materials I have.

Wish me luck, currently I’ll take any luck it helps!

Nile Plumb’s Animated Ice Bucket Challenge!

Here’s my Ice Bucket Challenge Video, done a little differently and more in my style. ANIMATED!

Enjoy and please donate to charity where you can.

The puppet as you can probably tell is print outs stuck to an armature body. The water is cling film. Replacement faces were used, and a two part bucket so the water can pour out from inside.
I also make my arms + bucket swap sides of the armature as it raises it’s arms.

If you wanted to do something like this yourselves I’d recommend printing/sticking printout onto a stiff card/paper to reduce scuffing and crumpling. There are good examples of this ‘2D model’ style in short stop motion films online

Jungle Tails Concept Models

Hello! Long time no blog post!

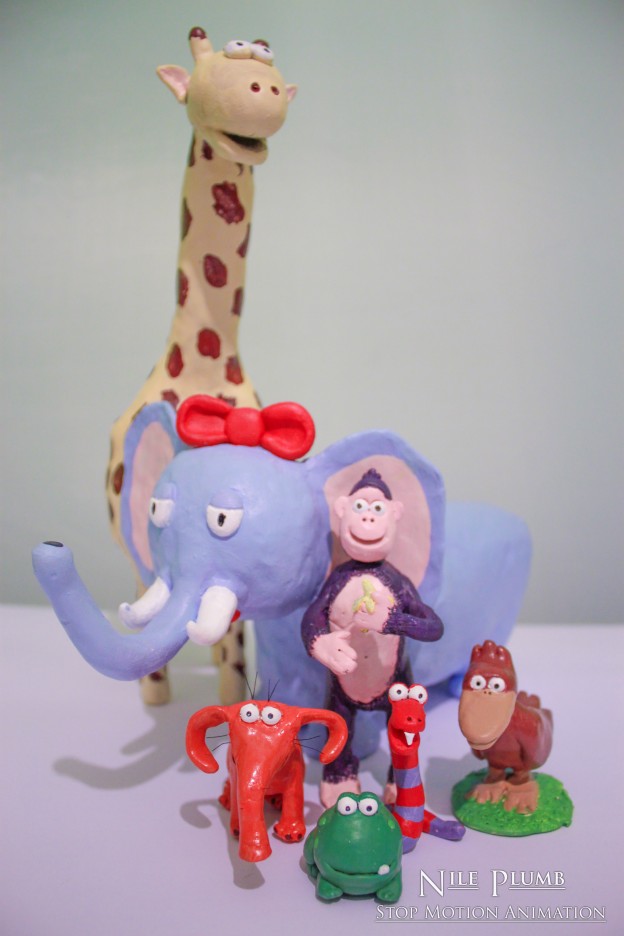
I’ve been busy working with a local author on turning her creative childrens book, Jungle Tails, into a short animation. After some scripts and storyboards and designs I’ve reached the concept model stage now, so I have something nice to share with you guys.

These models help establish a scale between all the characters (which is 1/20th their real life animal counterpart size, except the pixie frog he’d be a bit too small at that scale, so he’s a bit larger)

So we have a giraffe, an african elephant (females have tusks too), an ape (based on a chimpanzee), a shoebill bird, an aardvark, a pixie frog and finally a snake.

So enough talk, here’s the photos.

2013 showreel now live

After wading through and editing I have a version of my showreel I’m happy to punt around for now.
There’s always room to improve and chop and change in future, but for now here’s my brand new showreel for you to watch and enjoy.
For the best experience watch in fullscreen and HD

[vimeo 74287025 w=540]

Hope you enjoy! What do you think? Leave a comment for me and share to friends or family you think could be interested in my skills.

I want your music! For my showreel!

I’m making a brand new show reel to promote and show case my animation abilities but also would like a good soundtrack to accompany my short film clips, this is where you come in!
If you’re a budding soundtrack composer, rock out in a band, strum acoustically or mix electronic beeps and whistles I want to help to promote you too!
No need to record something new, time is very short for me at the moment, but if you have a track, instrumental or otherwise you would allow me to use in a show reel, I will give full captioned credits to you/your band.

Know someone who might be interested? Forward this on to them, I’m looking at getting finished by the 10th September at the latest so time is short, however I may make additional changes after this date so please don’t be put off, unfortunately I cannot use all submitted songs but I will use the most suitable sample/s for the footage and purpose.

Thanks! I look forward to hearing from you!